I’ve been a “Pinterest-er” for years now. Logging on daily for inspirsation.
Swooning over all of the amazing home remodels.
The gorgeous farmhouses set on acres of land.
The perfect kitchens and dining rooms.
I would log in to be inspired. But I would often time leave feeling defeated.
“I will never have that on our small budget”
That’s what I would always tell myself.
Most of the posts I was inspired by, are just not a reality for us at this stage in the game.
Who knows, maybe one day our pockets will be much more full then they are now and our reality will change.
But for now. EVERY PENNY COUNTS and we are pinching them any chance we get.
So when we moved in to this new home a year ago, visually, it wasn’t EVERYTHING we hoped it would be. But we knew there would be potential one day.
I threw on a coat of paint here and there when we first moved in, but since then we’ve put all projects on the back burner.
Until once again I was inspired.
But this time, after seeing some gorgeous and most likely very expensive home remodels on Pinterest, I decided I absolutely could have that, but for a fraction of the cost.

And I’m talking a VERY VERY SMALL fraction of the cost.
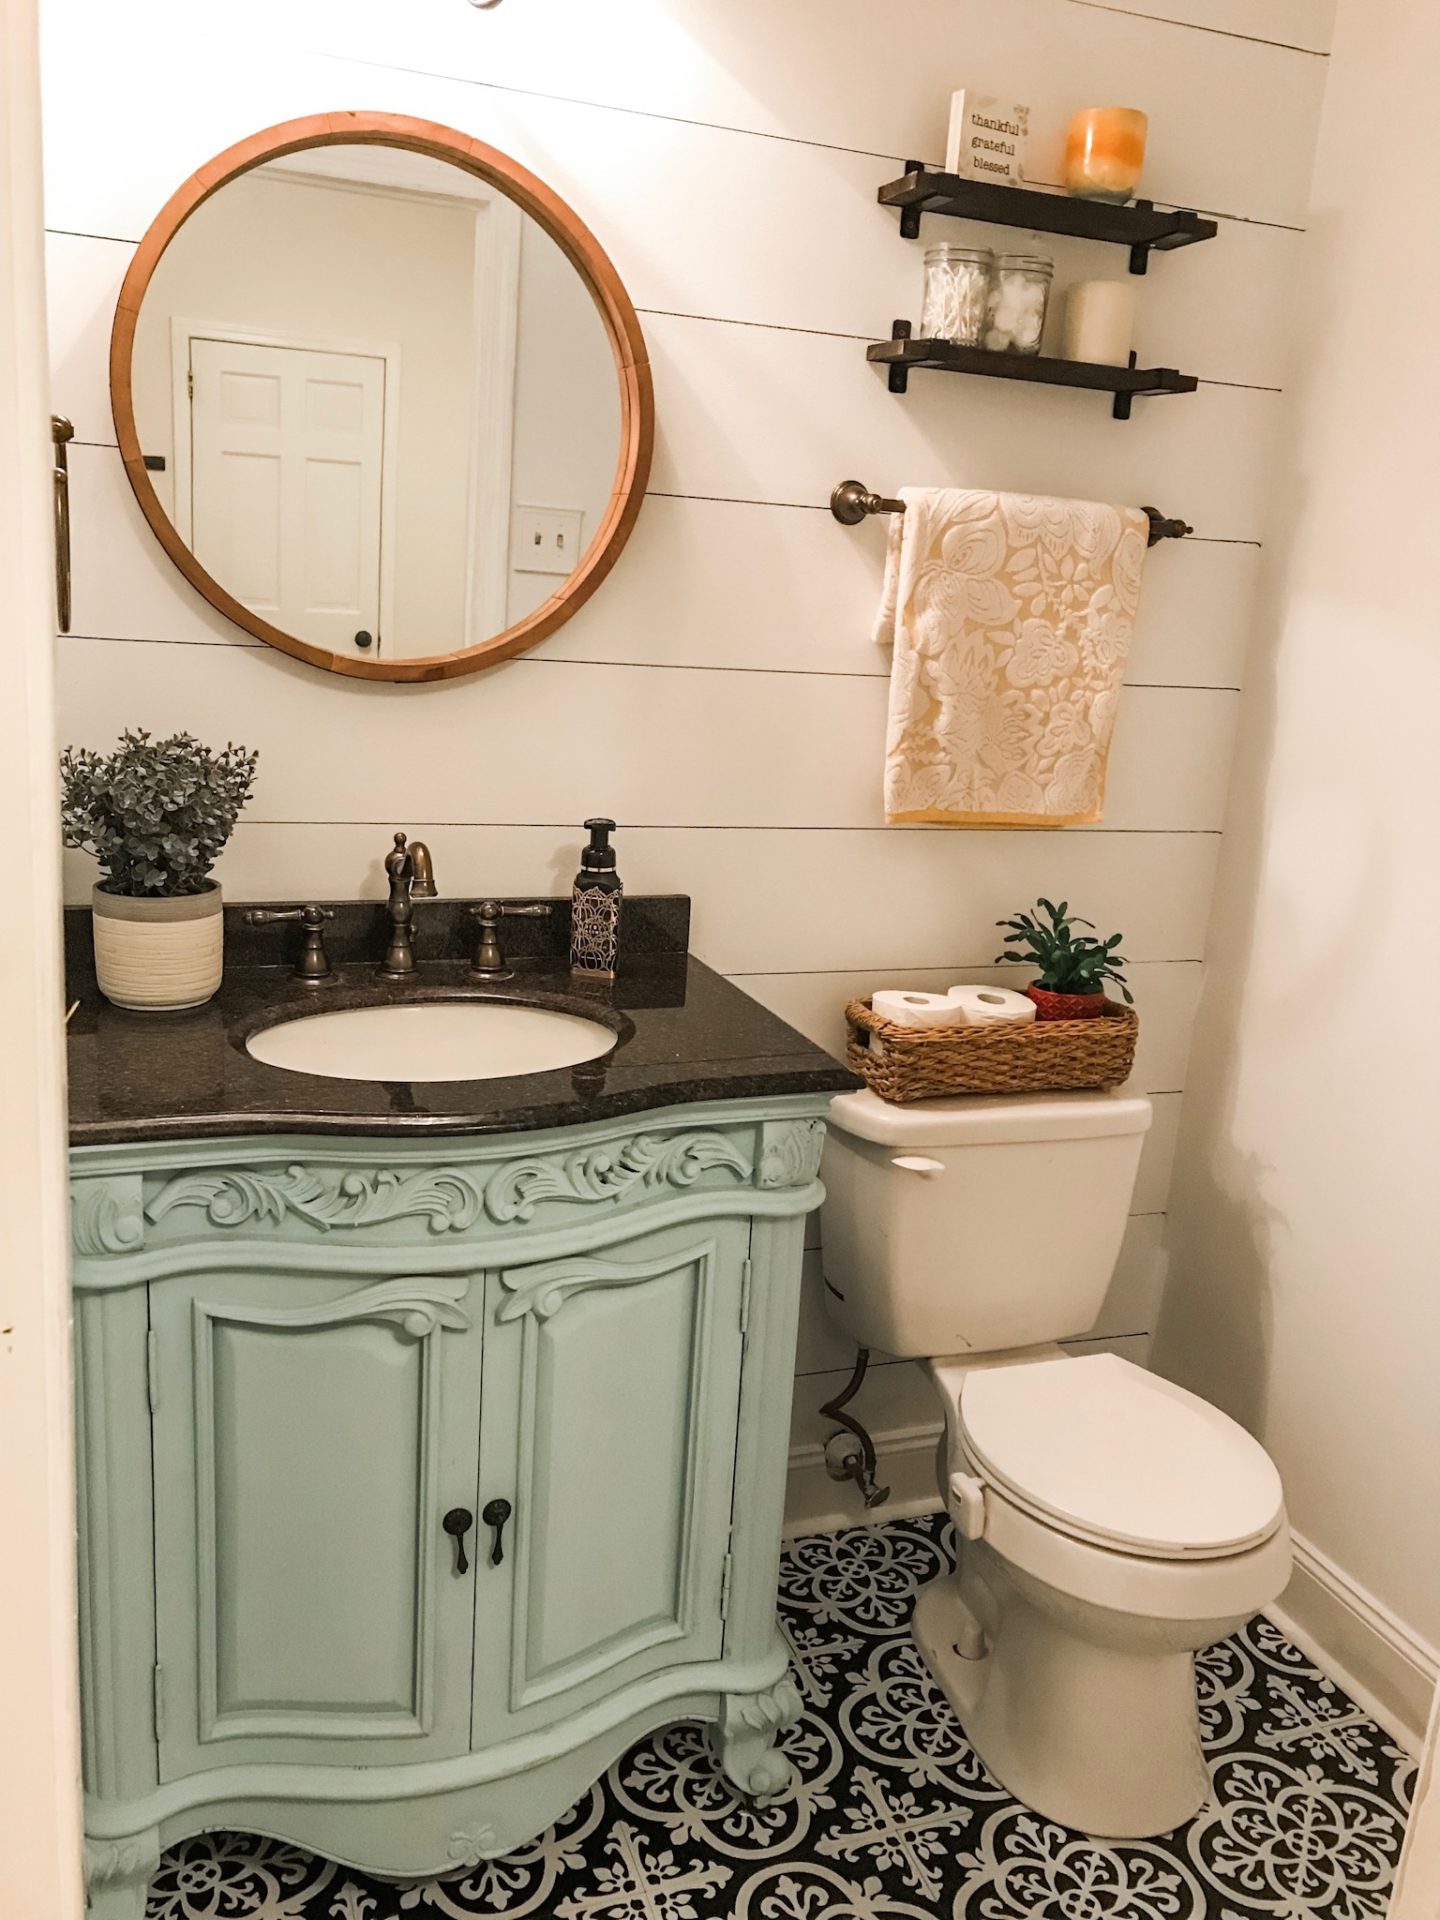
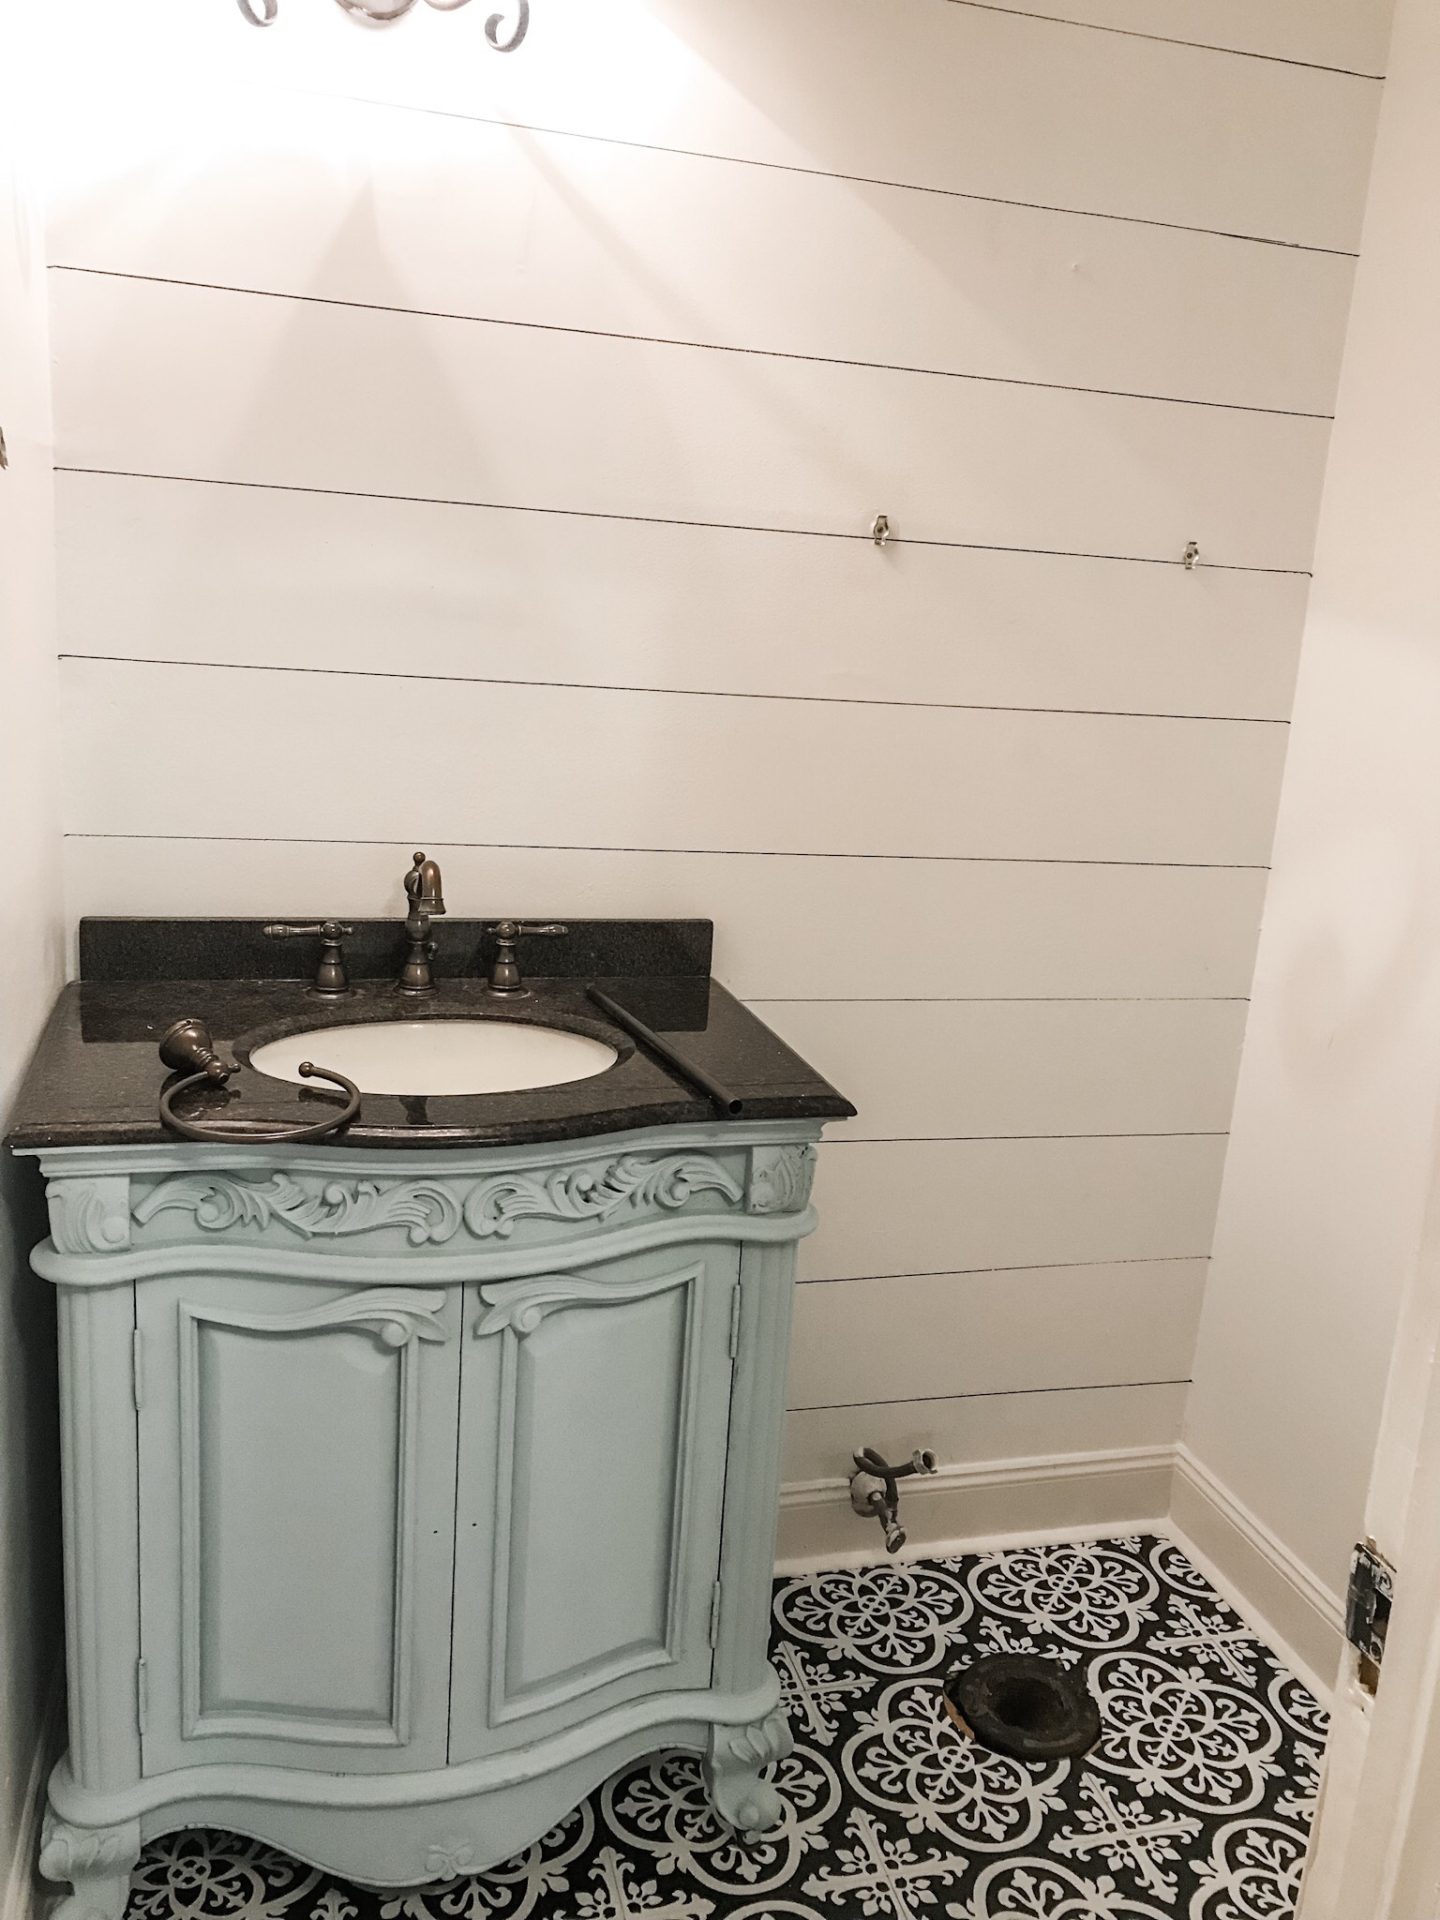
Project 1, I decided, would be our very small and very boring Powder room.
Though this room is super small and not used half as much as some other rooms in the house are, it’s one of the only rooms that guests use when invited over for parties and BBQ’s.
Here she is BEFORE:
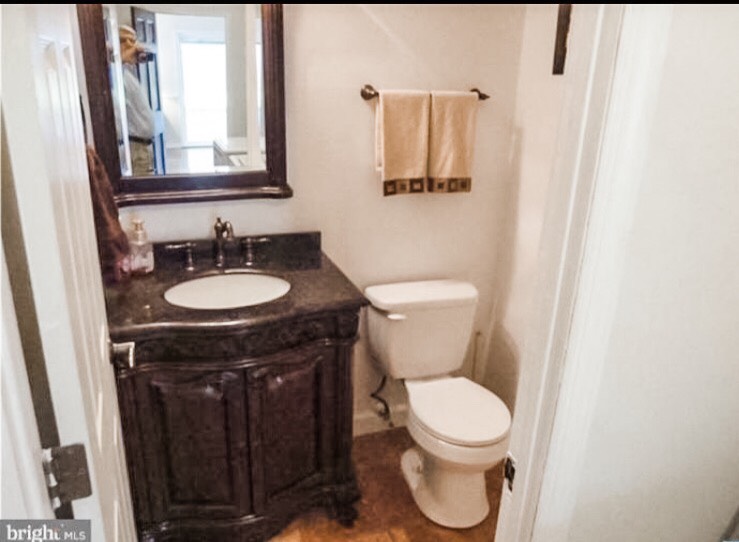
So, our first thought was that we were going to put money aside for it and replace nearly everything. New light fixture, pedestal sink, new toilet, and new tiles. Which even in this tiny space would probably end up costing us around $1000.
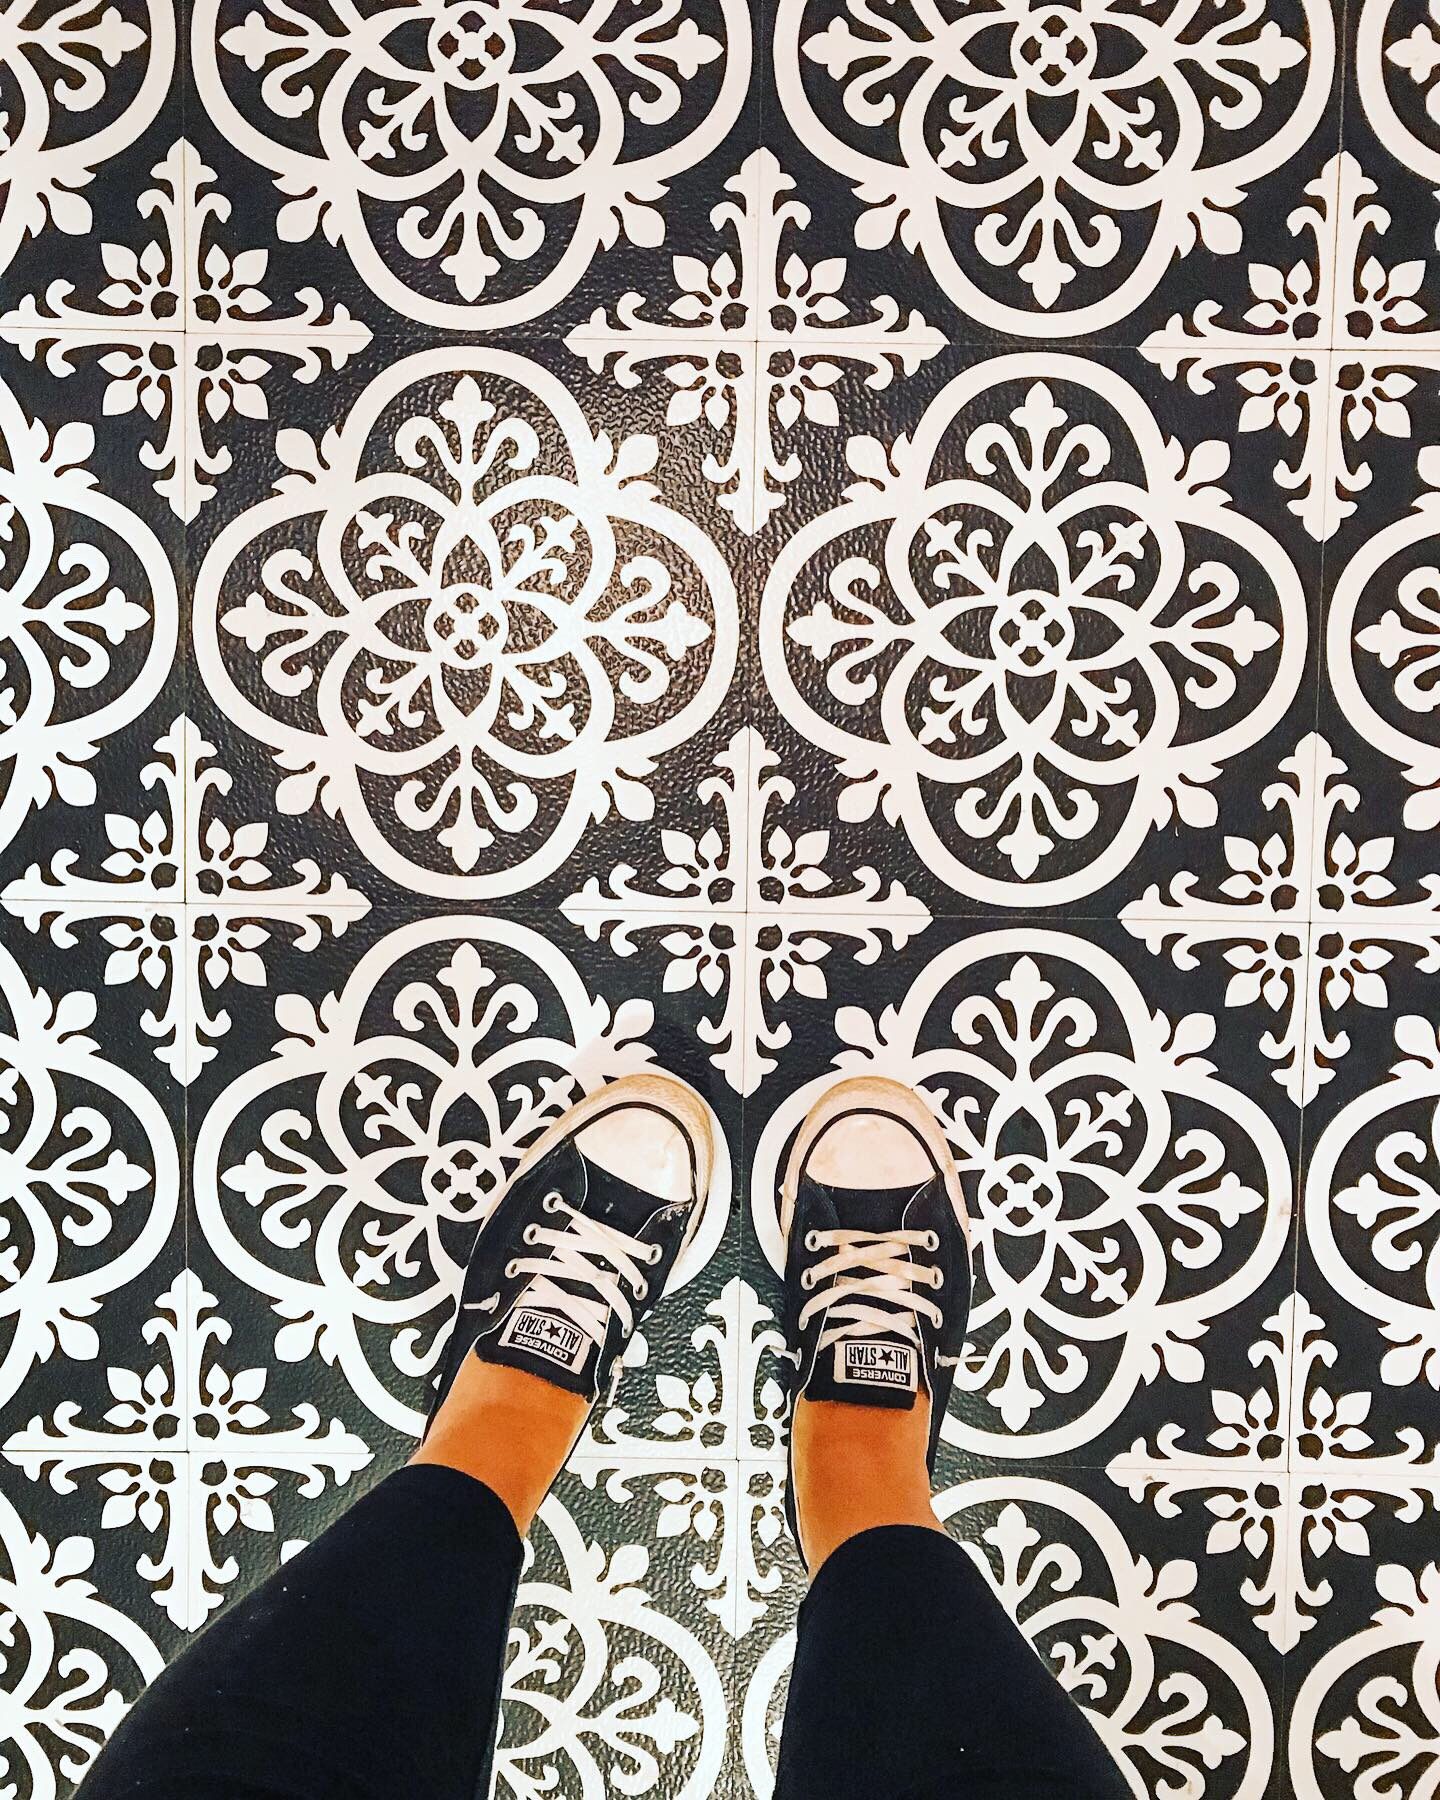
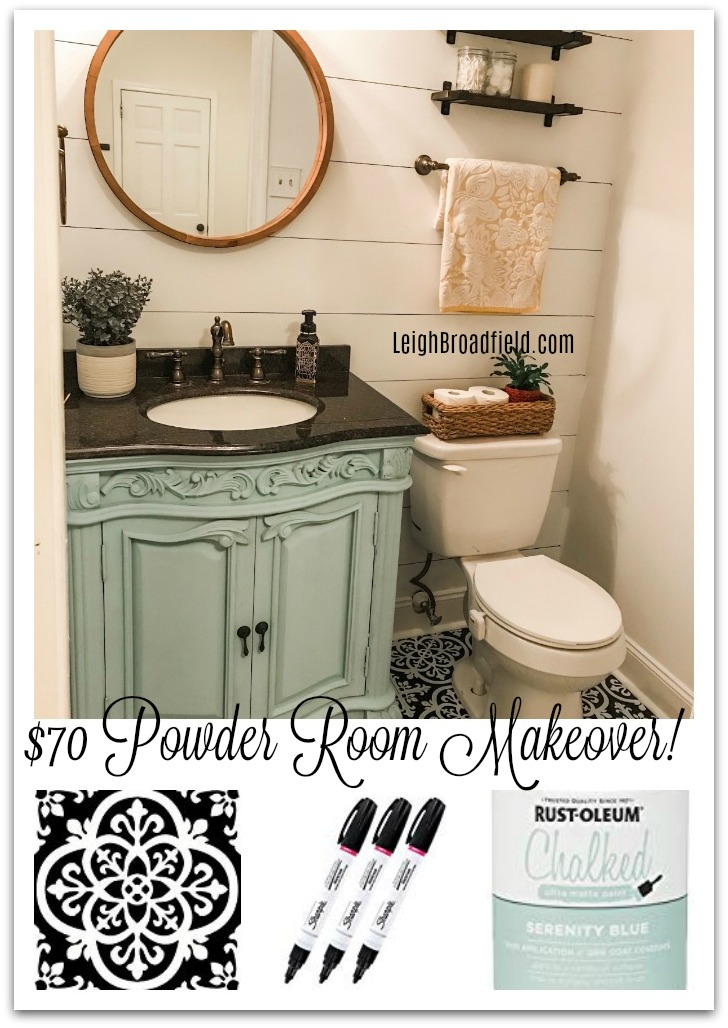
So then I stumbled across these Floor Pops on Amazon, read some reviews and decided to give them a try! At only $9.78 a pack what did I have to lose?!

So I just went to work and starting from the middle started laying them out….
Soo stinkin easy!
IN LOVE!
I mean seriously, I could have left everything else exactly as is and still had such a huge change in the space! These peel and stick floor tiles were so worth it!!!
It only took me 2 boxes bringing my total to $19.56 for the flooring.
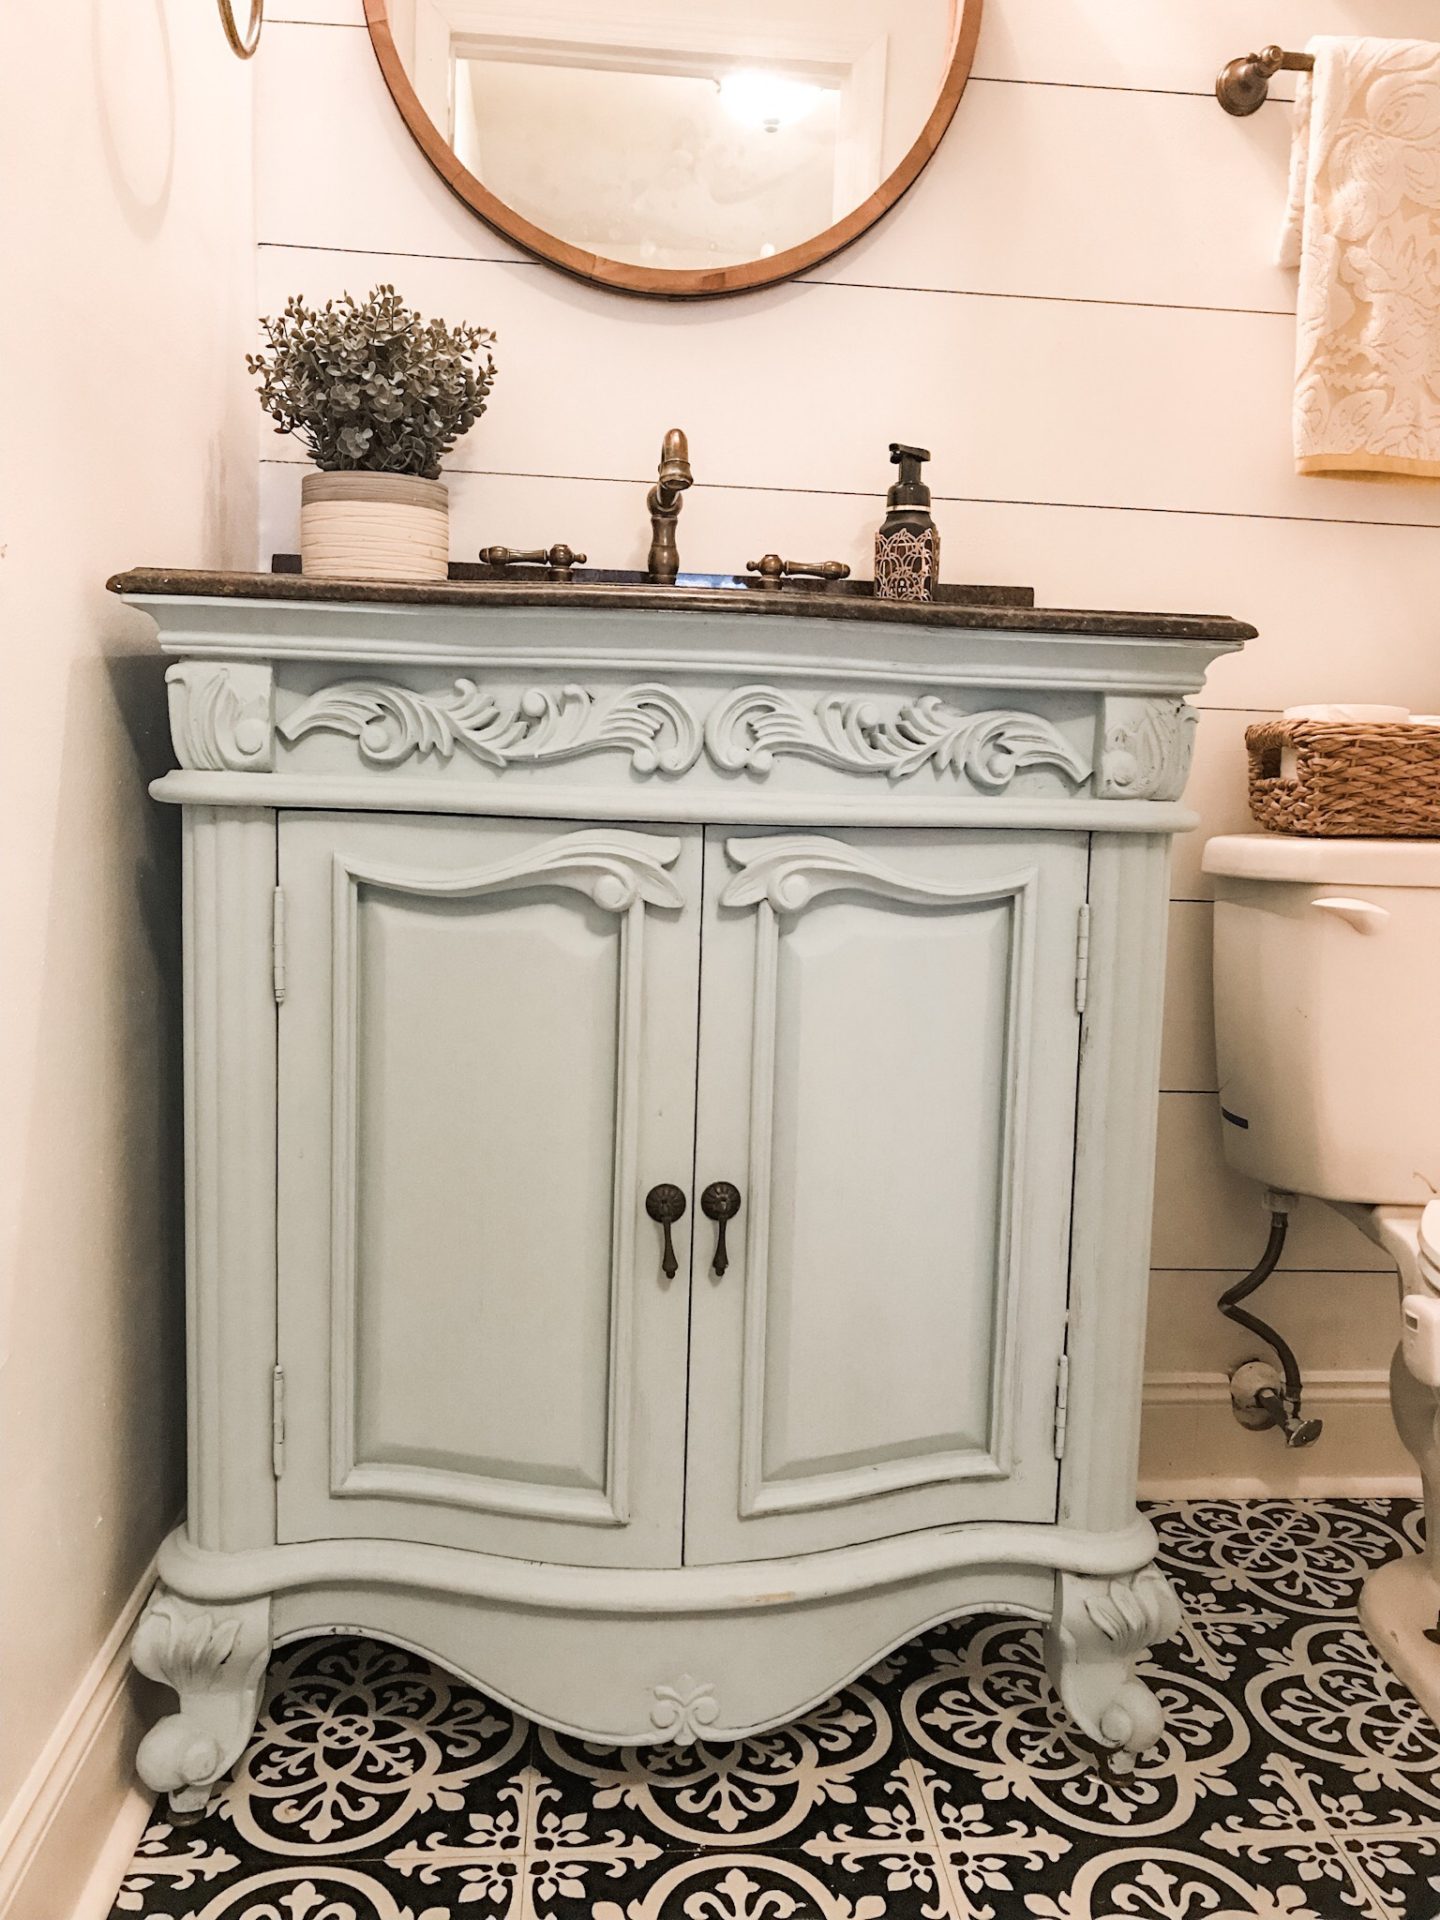
So the next thing I decided to change was the vanity and sink.
It was such an eye sore for us! The thing is huge in that tiny space, but we really didn’t want to put money out to completely replace it. So Chalk Paint it was…
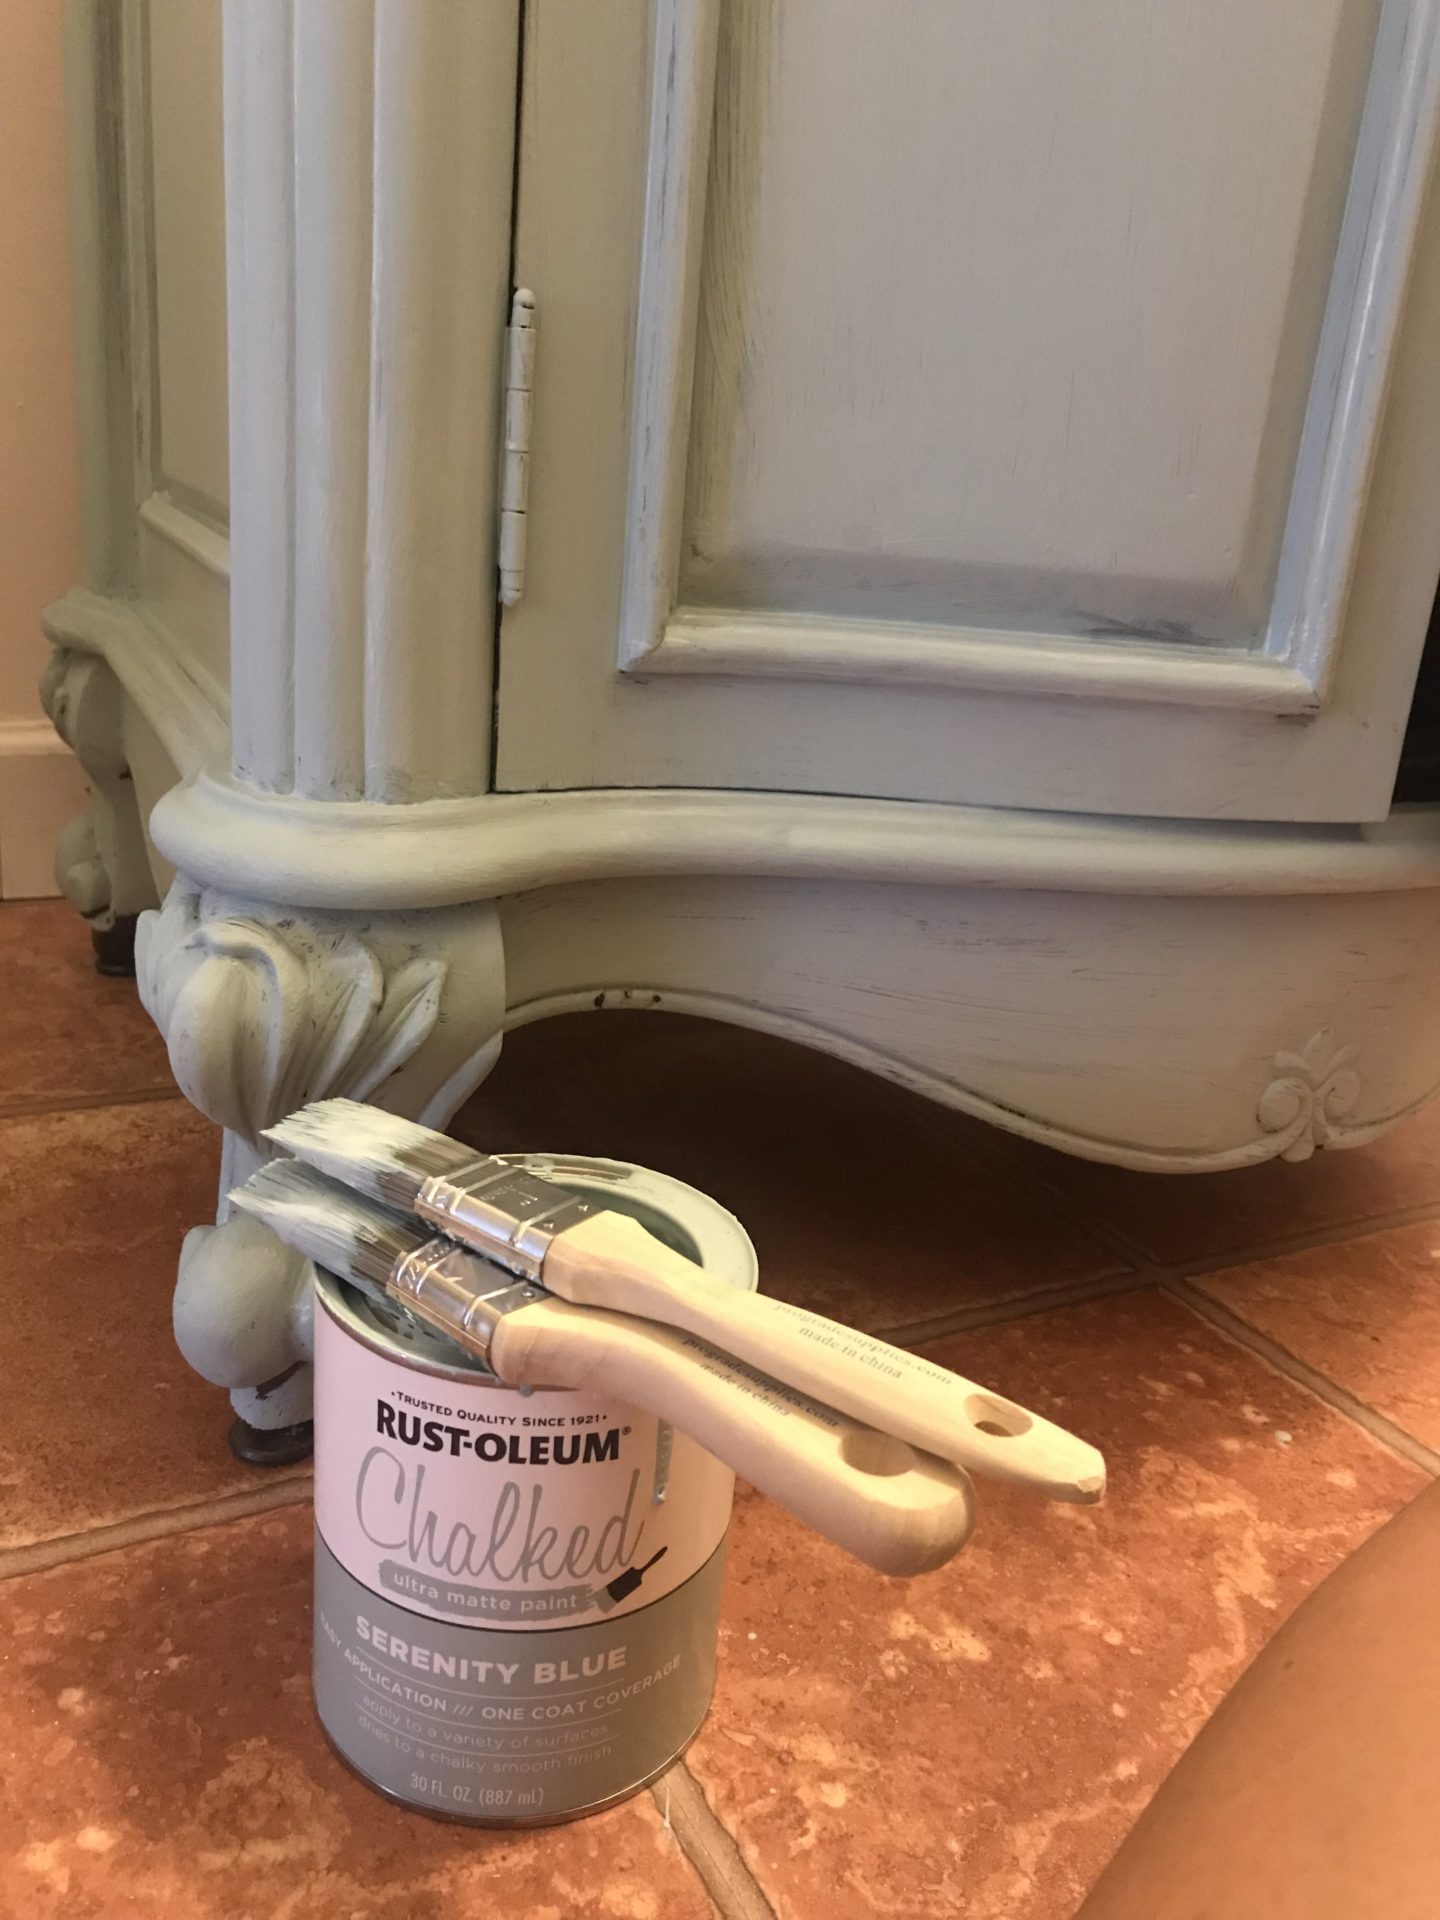
I decided on Serenity Blue because I thought it would go well with the black sink. I went with the Rus-Oleum brand which I have used and loved in the past. This 30oz can cost $17.98 and was plenty to get the job done.
I bought it over a month ago but was feeling a little too nervous to dive in. Once the paint was on there was no going back!
But we personally didn’t care for the look of this sink AT ALL, so again, we figured, what do we have to lose?


So coat one went out, and even in all its streaky undoneness I still loved it so much more then I did before and could not wait to get it finished and back in place.
Ok, so a little confession time. I am not in any way a professional painter/decorator. I do things super backwards half the time. For instance, putting in all of the tile before painting the bathroom. Didn’t make much sense, BUT it did kind of work in my favor as far as getting a good feel for the durability of the tile.
Going back, again, to my “Unprofessionalism” I did lay a drop cloth down, but still somehow managed to get caulk and paint on those pretty little tiles.
But guys….it cleaned up SOOOO easily! Even after it was dried on! 🙂
Next, I really wanted to have a fun accent wall, but I couldn’t, for the life of me decide what I wanted. My mind kept bouncing back and forth between a fun wallpaper and shiplap. It wouldn’t cost too much for that one small wall. But what if I could do something even cheaper, using Paint OR these fun Sharpie Paint Pens, that I also used to design some of my sons room last year. The black ones were only $8.99 for a three pack!
So I decided to do a Faux Shiplap by drawing lines on the wall….simple as that.
I hired my trusty husband for that job! It took him about 10 minutes to do the whole wall!


I feel like it really gave it that faux shiplap look and made such a difference in the room!
After that, the only other thing I bought were these tiny little shelves for $23.99.
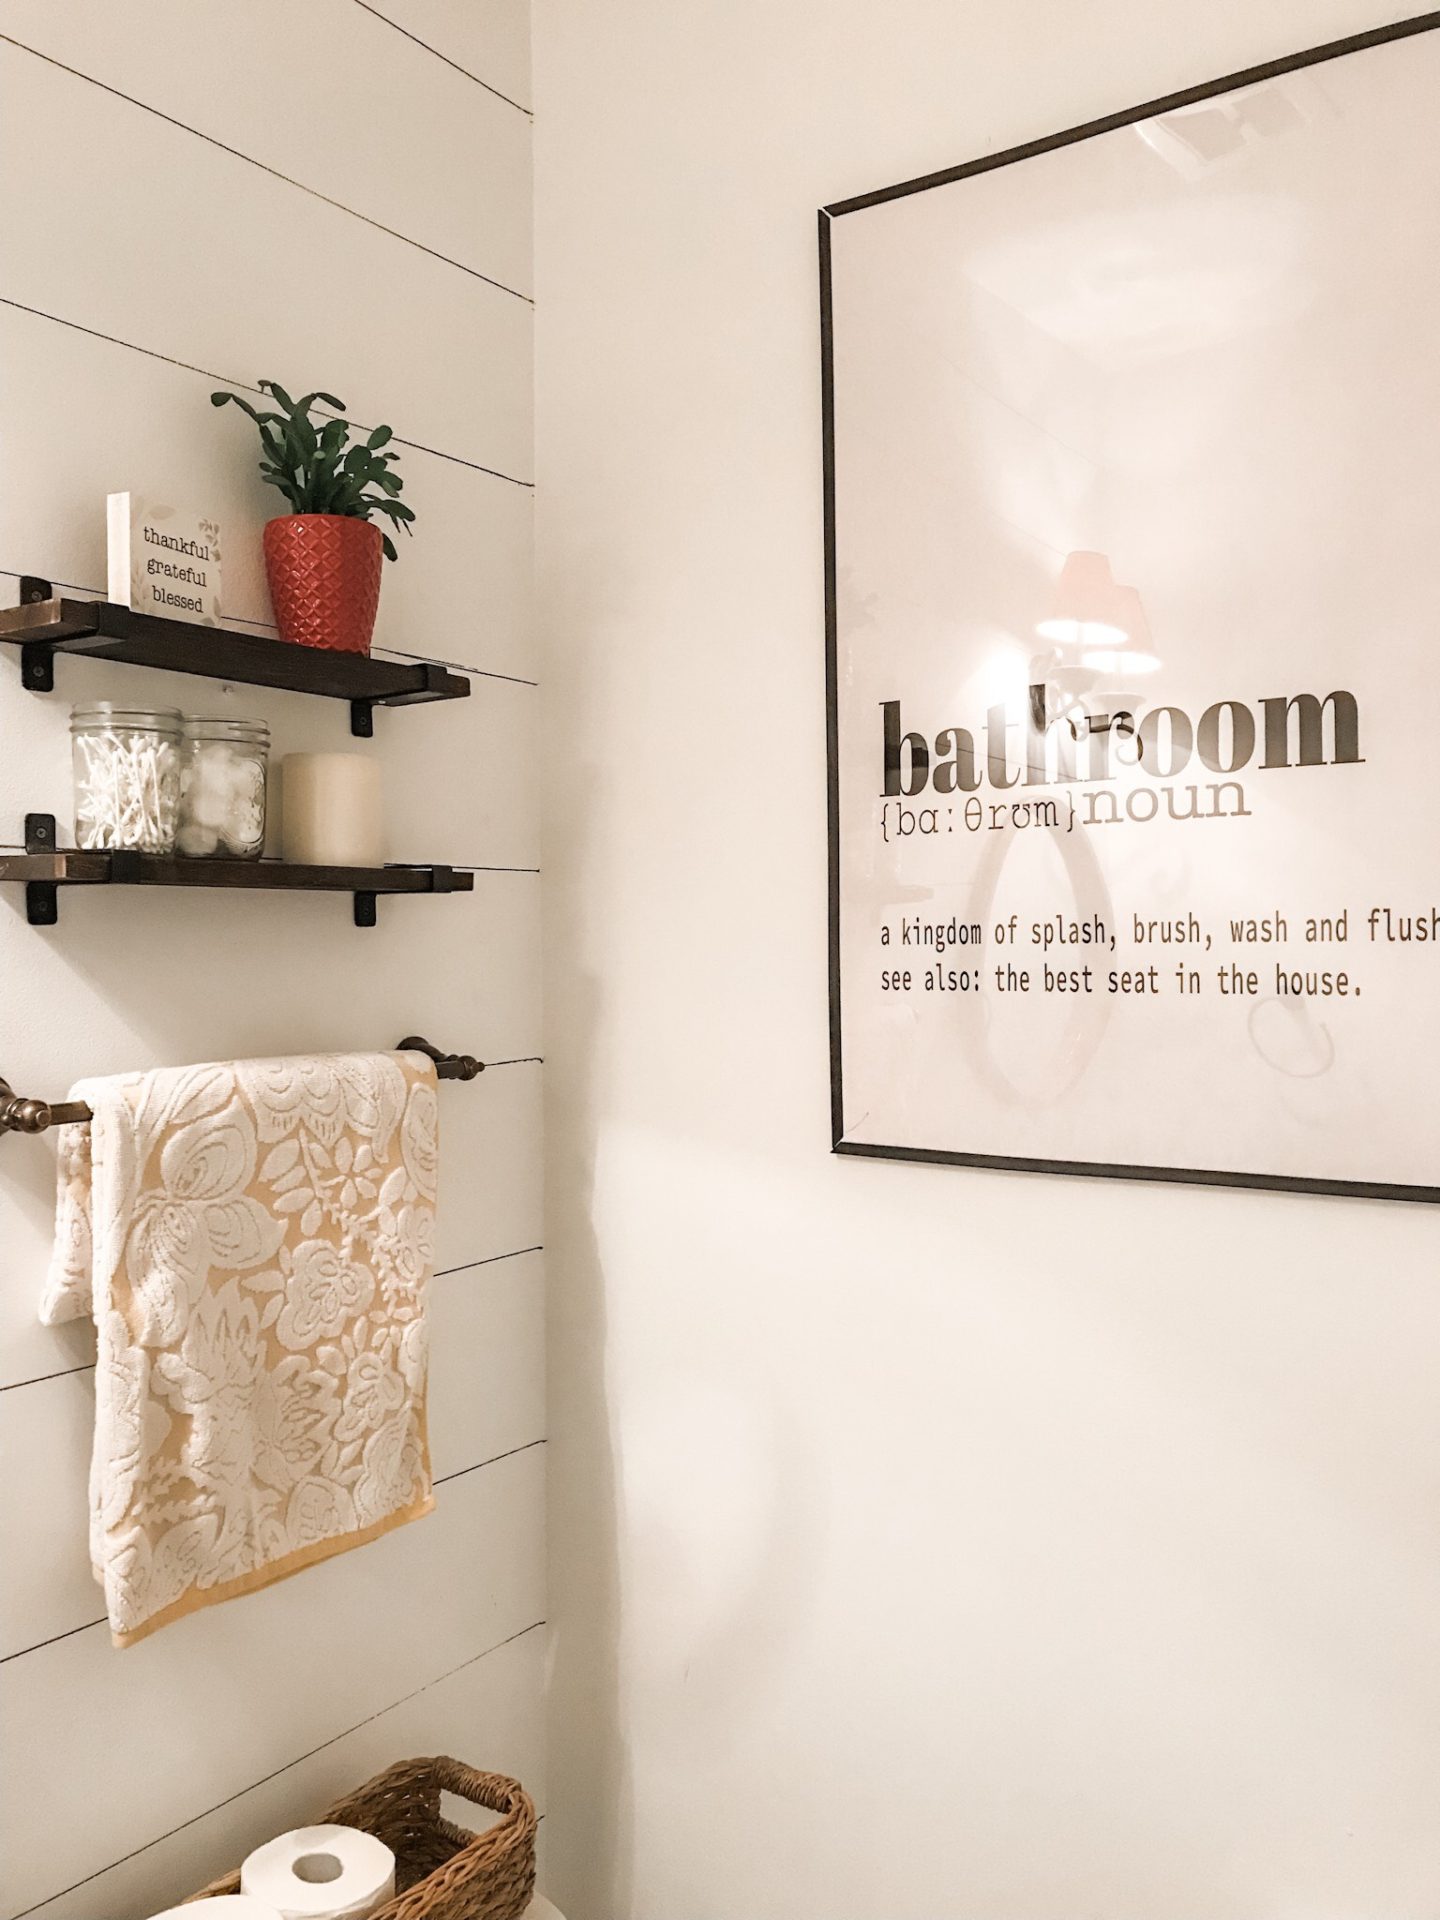
I definitely think the shelves cost more then they should have, but they were the cheapest ones I could find that went with what I had in mind.
Other then that, I used all the things I already had laying around.
I switched out the giant mirror for this smaller round one we had in our dining room.
And then just found some little knick knacks to fill the shelves.
I am IN LOVE.
I think it made such a huge difference and my total was only $70.52!!
Big difference….Little Cost….
I’m so happy I finally decided to just go for it and I can not wait to keep sharing all of the major changes you can make on a very small budget. It is so possible.
The power of paint and just using whatcha got is HUGE!
Resources:

**This Post Contains Affiliate Links**
This looks absolutely amazing!! You did such a wonderful job! And I can’t believe it was all under $100!!!
Author September 5, 2019 / 11:26 pm
Thank you so much! I spent so much time thinking it would be impossible to keep the budget so low. Feels good to finally realize we can make major change on a small budget! 🙂
You did an amazing job, it looks great! And that you could stick to such a terrific budget. Well done!
Author September 24, 2019 / 4:32 pm
Thank you so much!